We gaped for a while when we saw what Kalpit, one of our Farmizens was upto. Kalpit, along with his kids on an ordinary weekend made something extraordinary.
He created an inexpensive solar cooker AT HOME. Isn’t that too cool?
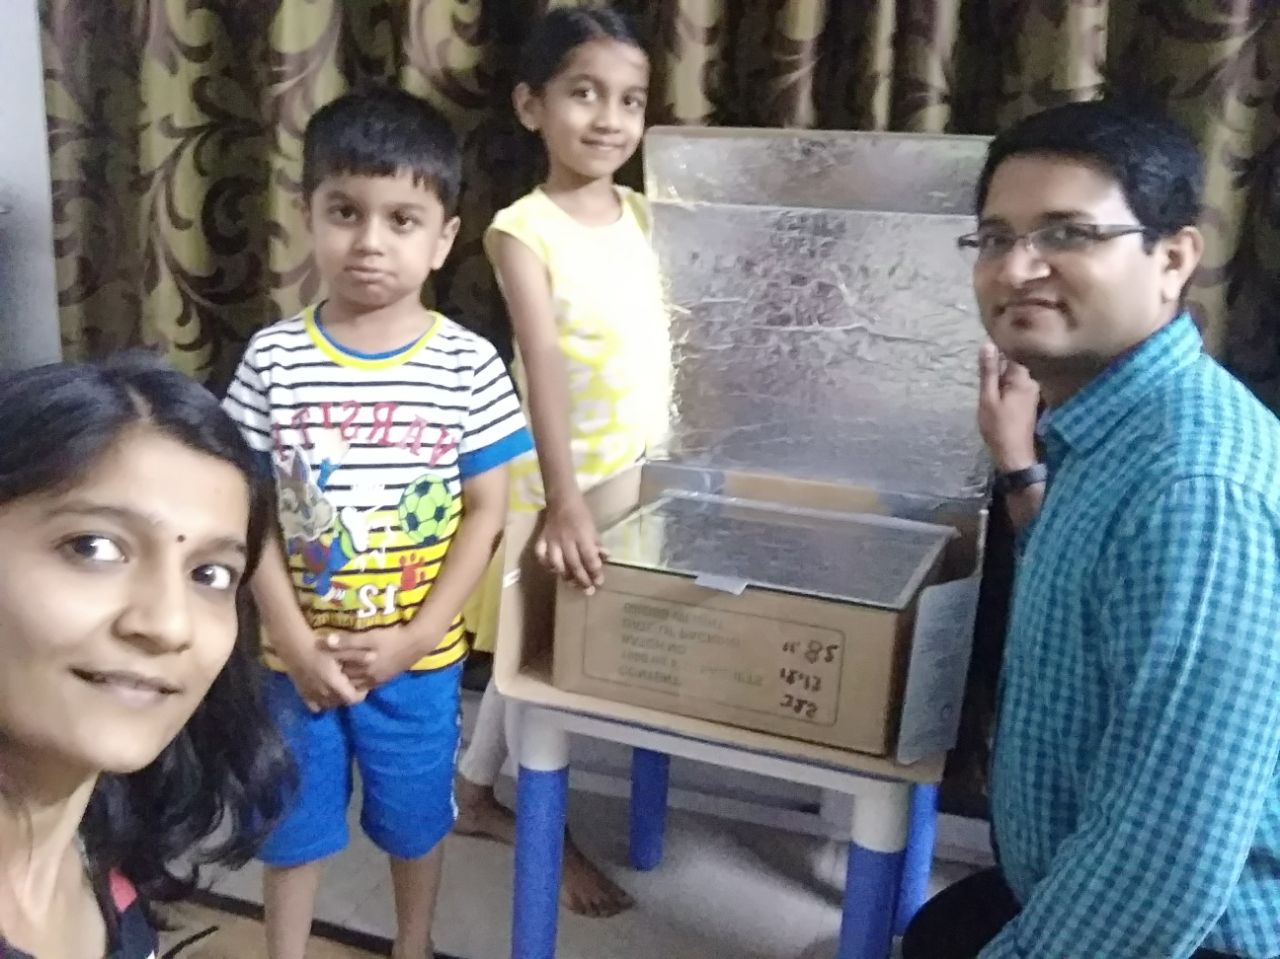
We think what Kalpit did was sheer genius, and very thoughtful. Kalpit turned a lazy weekend into a productive one and made sure that his children invest time in something useful.
Kalpit has made a brilliant move in the direction of energy saving, and we are just bowled over by his thought!
Kalpit’s wife Payal is a powerhouse of talent as well, and we did a blog on her. She is a master storyteller with a creative soul 🙂
Kalpit has shared with us the process to go about making an inexpensive solar cooker. Isn’t that neat?.
Here it is in Kalpit’s own words 🙂
“This weekend me and my family completed our first prototype of an inexpensive solar cooker.
Several videos on Youtube provided the necessary inspiration. The design we chose required following raw material:
- The main cardboard box (14 ” x 13” x 7 ”) [recycled]
- Secondary cardboard box slightly larger than the first [recycled]
- Food-grade Aluminium Foil — 9 meter roll [130 Rs]
- Thermocol — one sheet of approx 4′ x 2′ x 1 cm [70 Rs] (we used only a small part of it, before learning about not so ecofriendly properties of the material)
- A roll of matte black chart paper [25 Rs]
- 100 gm super glue [45 Rs]
- Glass — Plain, 15” x 14.5 ” x 4 mm [155 Rs with machine-buffed edges]
- Small roll of duck tape.
The basics steps are below
- Select appropriately sized boxes. You want the main box to be big enough so that you can cook a meal for the family, and small enough so that it doesn’t take too long to collect the necessary heat for cooking. You want the secondary box to be slightly larger than the main box in all dimensions. It is preferable that the main box has flaps on the top (the largest face) that open, while the second box has no flaps on the top (but may have on one of the sides).
- Cut all flaps of the main box from the top, and cut appropriate sized cardboard pieces from it so that each piece snugly fits on one wall on the inside of the main box.
- Get a plain glass cut for a size that is slightly larger than the top of the main box, so that it rests on the edges of the box without slipping in along any side. This is to create the ‘green-house’ effect by trapping sun’s heat inside the box. As per other solar cooker enthusiasts on the web, it’s possible to create a similar effect by simply covering the top of the main box with a sheet of food-grade transparent plastic.
- Paste the bottom of the main box with a black chart paper. Here we used thermocol base, although it’s actually not necessary. If the base of the box is not strong, you could also take two / three sheets of cardboard with the exact dimension (cut from other spare boxes), put them at the base of the main box and glue the chart paper on top. Alternatively, you could also paint the top cardboard sheet with matte black paint. Matte black color is an excellent heat absorbent.
- Paste aluminium sheet on each of the four cardboard flaps cut out in step 2 above. Put thus wrapped flaps on each inner side of the main box. Stick with glue if necessary. This act as a reflector for any ray of sun that has entered the box (through the glass) but hasn’t hit the bottom black layer.
- Stick one edge of the glass with the back edge of the main box using duck tape that acts as hinges. You can use thin strips of cardboard to make the hinges stronger if necessary. Stick a piece of ducktape on the opposite (front) edge of the glass that acts as the ‘handle’ to lift the glass open.
- Press/buff the top edges of the main box so that when the glass rests on them, there are no major gaps left between the glass and the edges of the box. This is necessary to trap the heated air inside the box. The main box is now ready.
- Put the secondary box in a way that the side with the flaps (for opening) is facing you. If the opposite side also has an opening, bolster it with other pieces of cardboard if necessary. Then cut open the top of the box by cutting across the two side edges, while leaving the back edge as is to form a hinge.
- Lift up the top, and paste aluminium foil on the inside. This now acts as the ‘reflector’ to push more solar energy towards the main box.
All in all, it took less than 4 hours effort to make this cooker. This includes the detours taken to keep kids excited and contributing to the manufacturing steps.
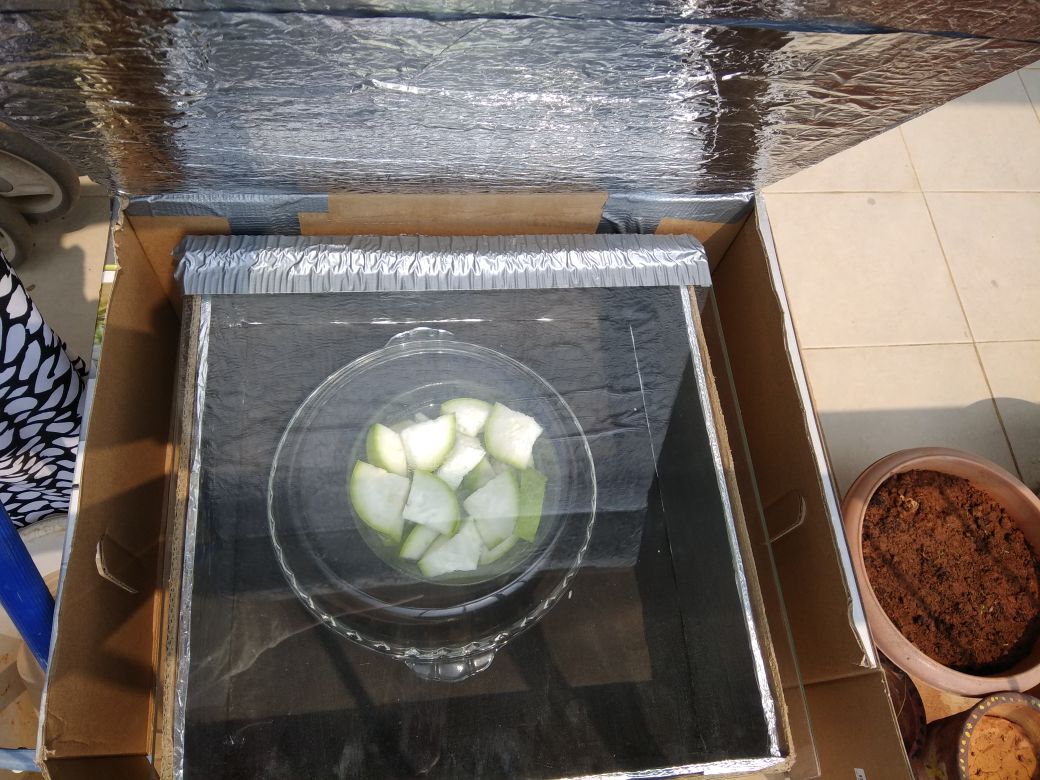
The morning sun was strong enough to cook rice in 2 / 2.5 hours. We put rice in a glass bowl, with a glass lid. While the rice was properly cooked and tasty, it had a faint but distinct smell of ‘glue’ 🙂 . We figure this was because 1) this was the first use (and we didn’t curate the inner linings before use), 2) for the first 15 minutes or so, we left the glass bowl open without any lid. For the sake of experiment, we also put rice in a steel container with steel lid (both shiny). That didn’t cook at all, presumably because it reflected most of the sunlight away. We look forward to more such experiments over the next few weeks.
Things to try in the future prototypes:
- Try with plastic instead of glass to create green-house effect. If it is equally effective, it removes one major dependency to ‘purchase’ from a special shop.
- Try with a steel food container with a matte black coating on the outside.
- The aluminium foil on a cardboard creates a lot of creases. This helps in diffusing the reflected energy.
- Look for equally cheap and ecofriendly alternatives for the reflective material which are easier to stick without creases.
- Instead of plain, try tinted glass that allows infra-red to pass only in one direction.
You can make aroma-rich food in this cooker. You don’t require lots of money and fancy equipment to make this.
The original blog can be viewed here.
Kalpit and Payal have started cooking regular food in the cooker after fine-tuning it a bit. Here is a picture of Farmizen bottle gourd getting boiled in the solar cooker powered by Kalpit!


Comment